PinForce Web is a management tool that complements PinForce Manager and is used in conjunction with the following PinForce products:
This section describes how to navigate to the main PinForce Web features and use the set up functions:
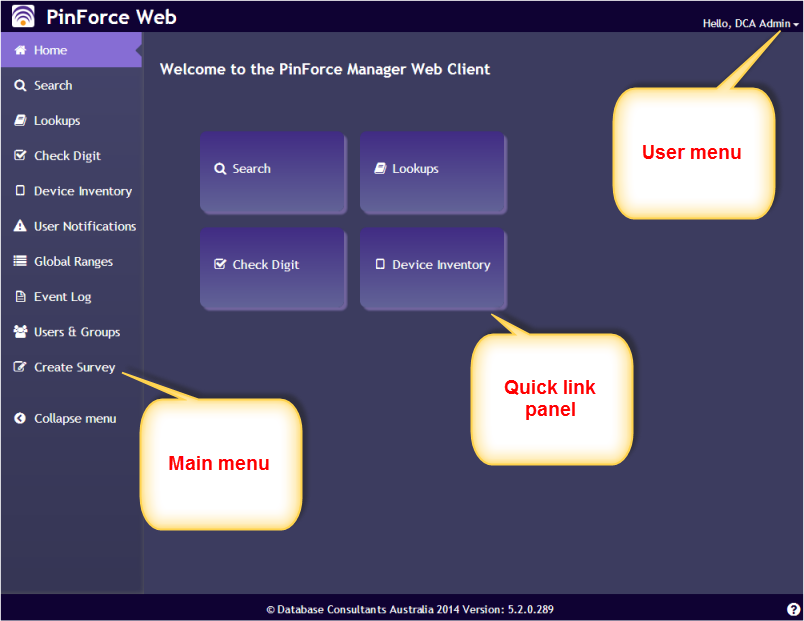
The Home page dashboard is displayed when you first log into PinForce Web.
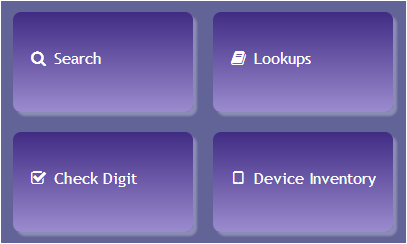
The Home page provides access to:
The quick link panel contains links to the most popular tasks.
The User Notifications panel displays a summary of the details from the User Notifications page.
This will only display if the user's settings allow access to this feature.
To quickly access the User Notifications page:

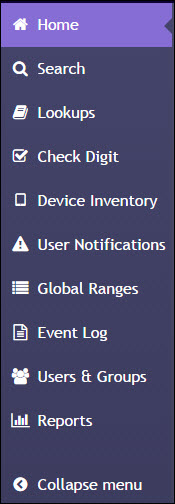
The main menu provides links to all the available PinForce Web functions.
To minimise the main menu so it doesn't take up so much screen space:
![]()
The highlighted menu function is the function that is currently open on the screen.

![]()
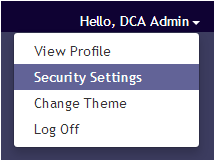
The User menu provides users with the ability to:
To display the User menu:
The User Profile is a read-only screen that displays a user's current details:
To display the User Profile:
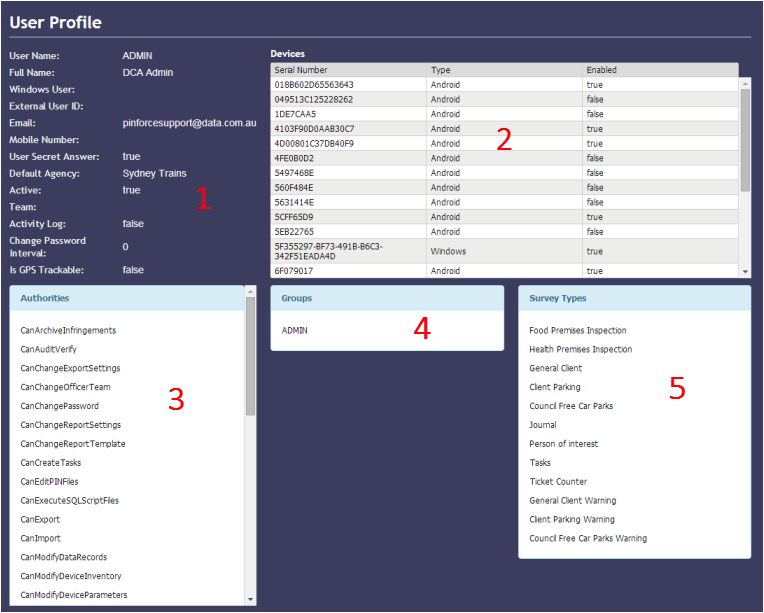
The User Profile screen is split into 5 panels containing:
Users are able to perform the following security related functions:
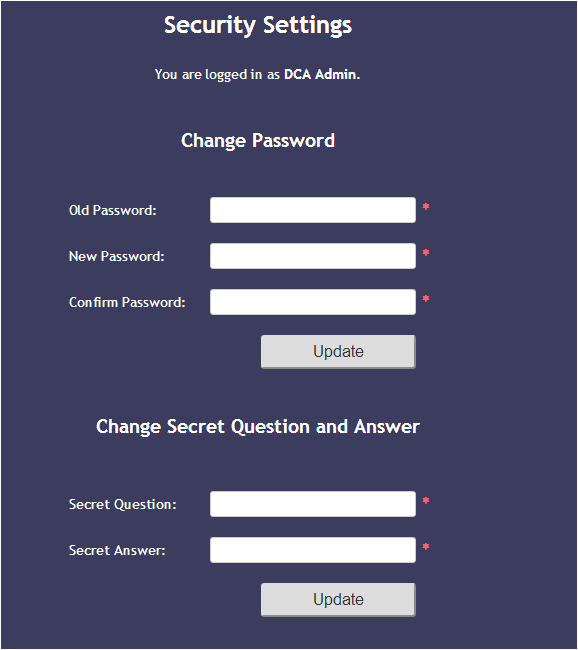
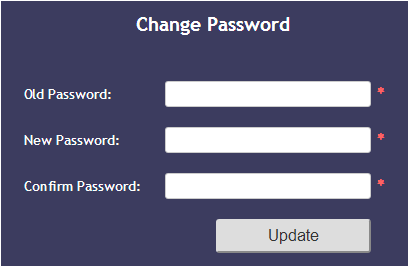
To change your password:
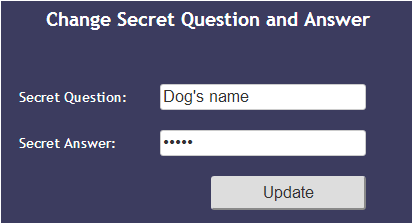
The secret question and answer functionality is optional and is set up in user preferences. It provides extra password security where users are prompted to enter the answer after a defined number of failed attempts to login.
To change your secret question and answer:
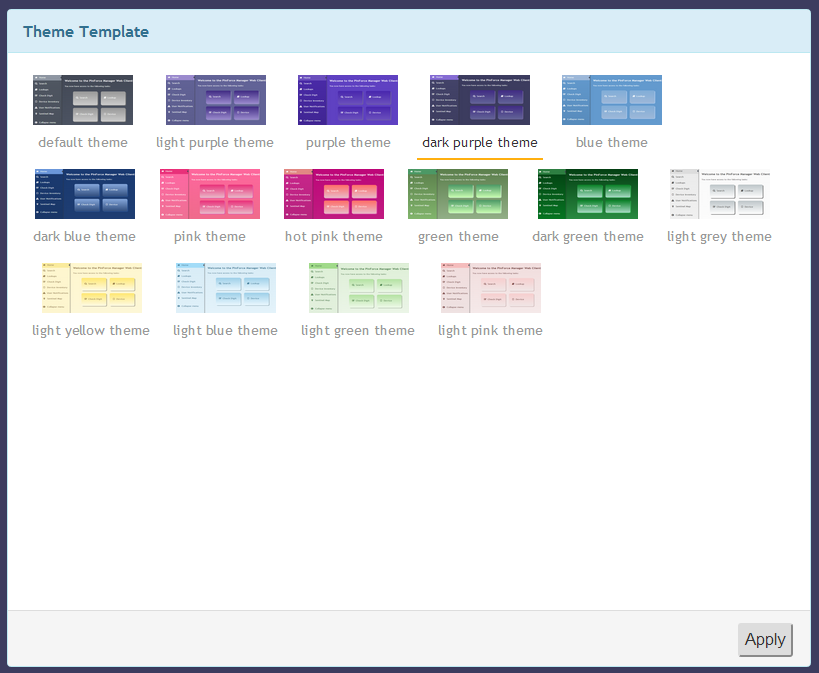
To change the theme (colour scheme) of PinForce Web:

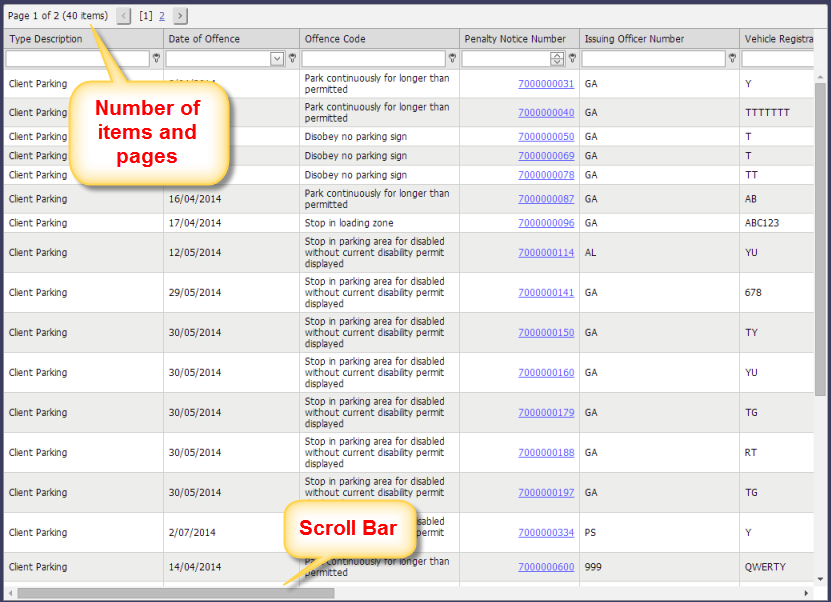
Most of the data in PinForce Web is displayed in grids, for example:
This section describes how to:
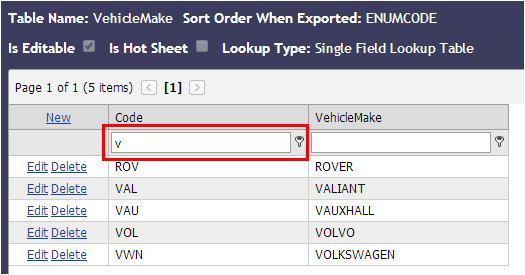
To search for a particular field value in a grid:
This will automatically filter the results to only display records that contain the search string.
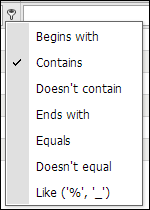
To refine the filtering:
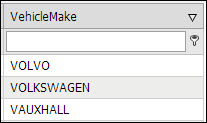
This will display the following list of options that can be applied against the string entered in the filter field (e.g. Equals).
To sort a grid by a particular column:
This will sort the values alphabetically and display ![]() against the column header to indicate that the lookup table is sorted by this column.
against the column header to indicate that the lookup table is sorted by this column.
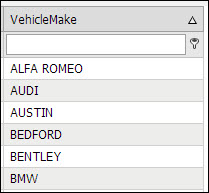
To change the sort order to reverse alphabetical:
This will sort the values reverse alphabetically and display ![]() against the column header.
against the column header.
The Search function provides users with access to Survey details.
Surveys are created using PinForce Mobile, PinForce City Wide and PinForce LPR and are imported into PinForce Web when the device used to create the surveys is synchronised.
The Search function instructions fall into the following categories:
This section describes:
To display the Search window:
The Search window is divided into 3 sections:
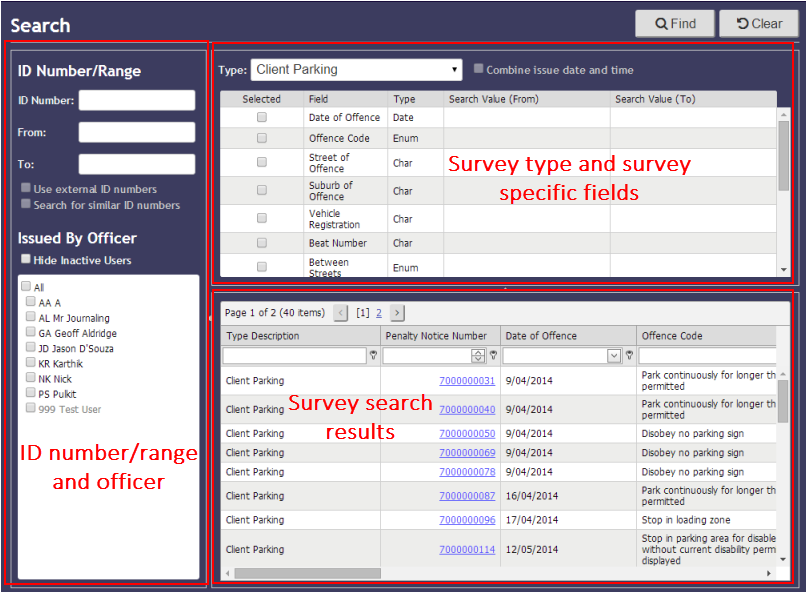
The Search window can be configured to hide one or both of the following sections in order to make the survey search results more visible:
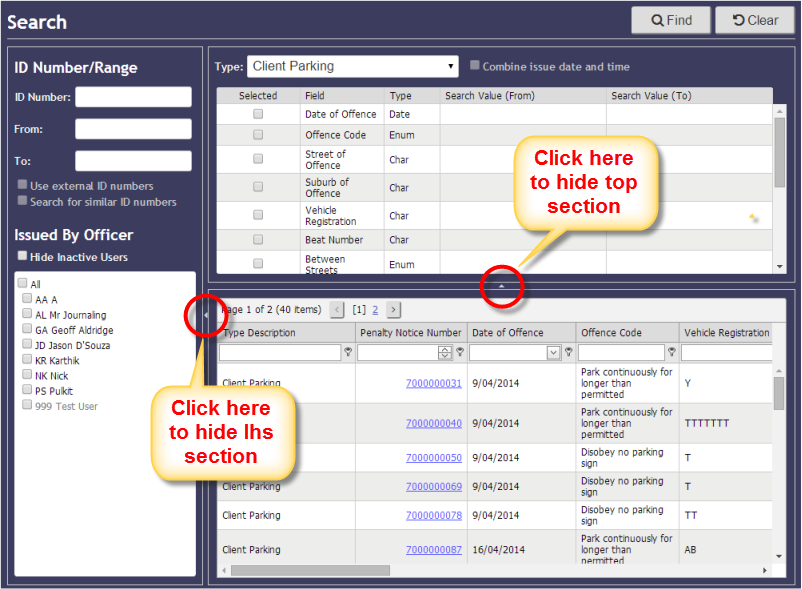
To hide the Survey type and survey specific fields selection section:
To hide the ID Number/Range and Officer section:

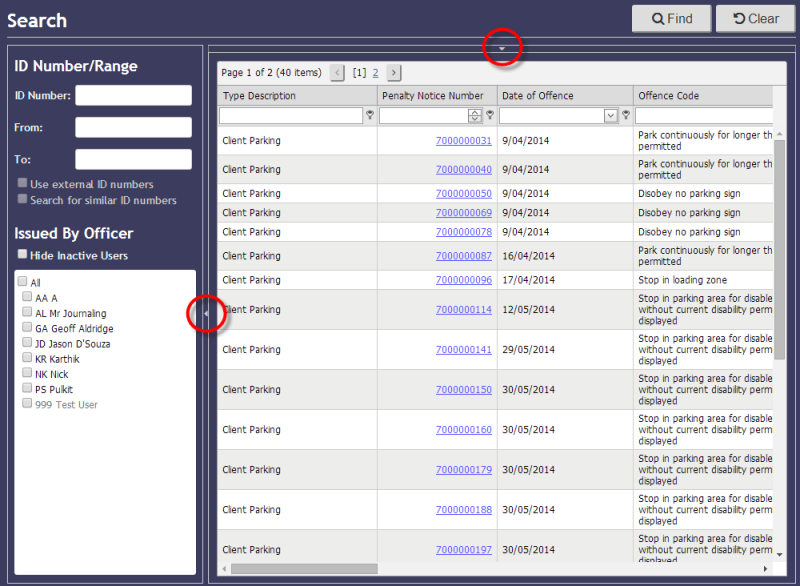
To redisplay any of the hidden sections:
Surveys can be searched for using one or a combination of the following survey search methods:
To perform a Search:
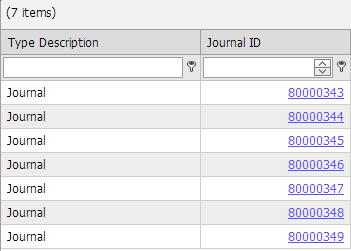
Surveys that match the search criteria will be displayed in the Search results grid.
To clear any search criteria entered:
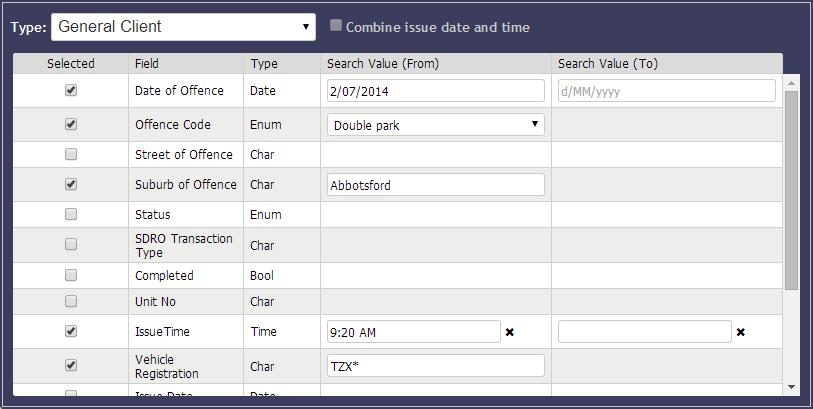
Survey types fall into the following categories:
To search for surveys for a particular survey type:
Survey specific fields vary depending on the Survey Type selected.
This allows users to further filter the search results.
To enter survey specific search criteria:
Search value formats |
|
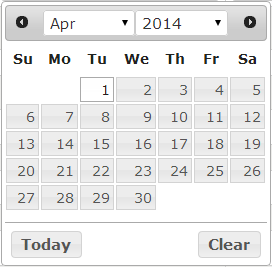
| Date |
Select the date from the selector. This defaults to the current date. Use the month and year drop-down list to change the value |
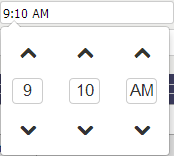
| Time |
Select the time (hours, minutes and am/pm) from the selector. When a time field is selected, the Combine issue date and time checkbox is enabled. When the Combine issue date and time checkbox is ticked the date and time are combined to provide a range from the start date and start time to the end date and end time, e.g. 1st March 09:00 – 10th March 18:00 When the Combine Date and Time checkbox is not ticked the time is an absolute for the date range, so that only the time frame selected for each day will be analysed, e.g. 1st March 09:00 – 18:00, 2nd March 09:00 – 18:00 through to 10th March 09:00 – 18:00. |
| Drop-down list |
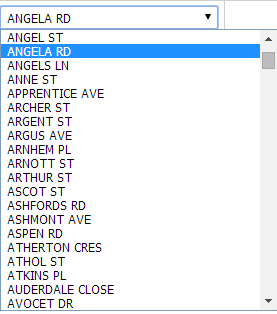
Select the value from the drop-down list (using the scroll bar) or jump straight to the location of the value in the list by typing in part of the string, e.g. Angela. |
| Text |
Type in the full value, or part of the value using the asterisk (*) wildcard. Wildcards can represent one or many characters. For example, john* would find John or Johnson and *son* would find Johnson, Robertson, Sonny, Bosonville etc. |
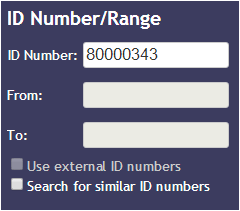
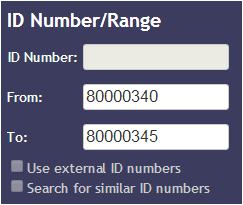
The Search function provides the option to search by survey ID number or a range of survey ID numbers.
Note: Select All Types from the survey Type drop-down list to ensure that the search is performed on all surveys.
To search for single survey :
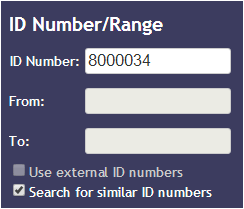
To search for survey with similar ID numbers:
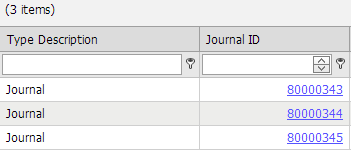
To search for surveys that fall within an ID number range:
The Search function provides the option to search for surveys issued by individual officer(s).
The Officer list displays all the active officers followed by any inactive offices (greyed out).
Note: Select All Types from the survey Type drop-down list to ensure that the search is performed on all surveys.
To search for surveys issued by an officer(s):
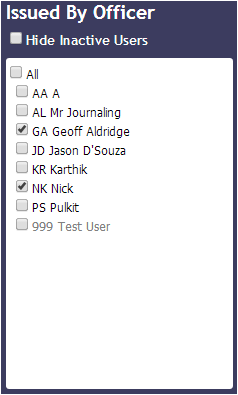
To remove the display of the inactive users from the list:
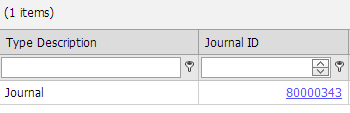
After running the Search function the survey search results are displayed in survey search results grid.
This section describes:
The Search results grid displays:
The Search results grid offers the standard grid functions, refer to Working with grids.
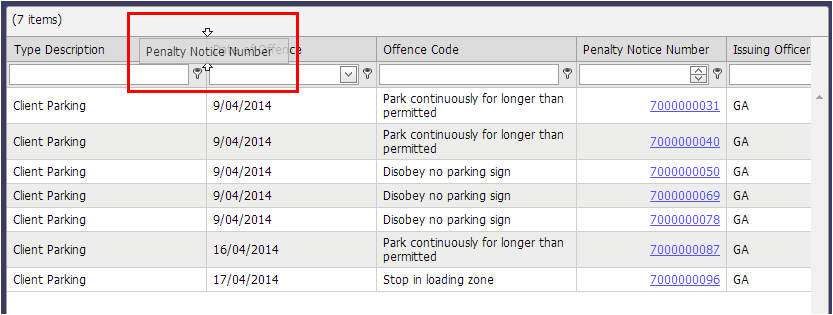
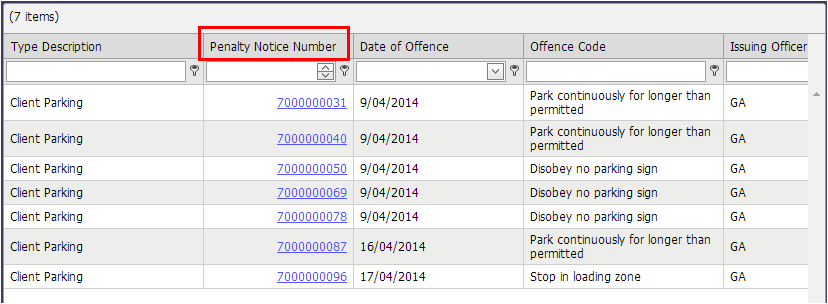
An additional feature is the ability to reposition the columns. This is a useful way of making sure the most relevant columns are displayed at the front of the grid without needing to scroll to view the values.
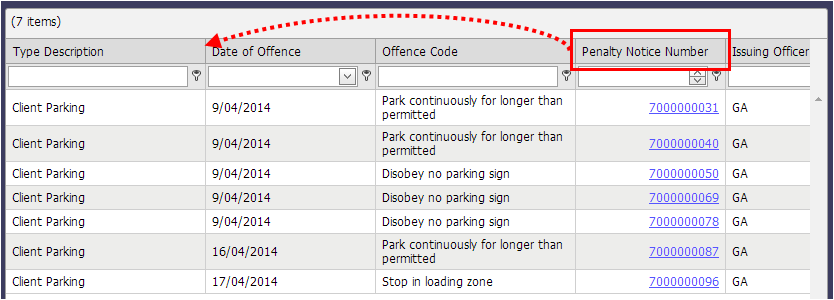
To reposition a column:
To open a survey record:
This will open the survey in separate window.

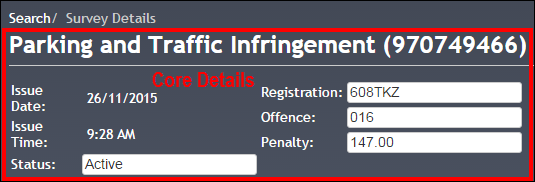
Survey records contain a combination of the following characteristics, depending on the survey:
Core details are applicable to all survey types and are displayed at the top of the survey details page.
These details include:
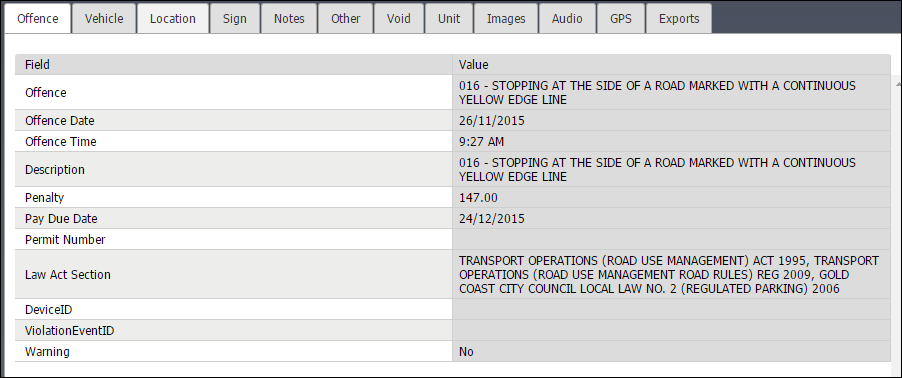
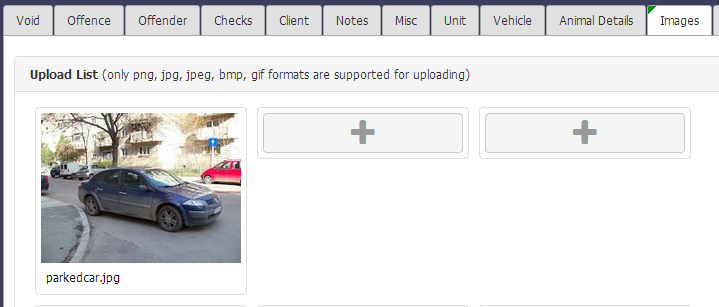
Each survey contains a set of details that are specific for that survey. These details are grouped in tabs and each tab contains a 2 column grid of field names and the field values.
The Images tab contains recontains photos that relate to the survey.
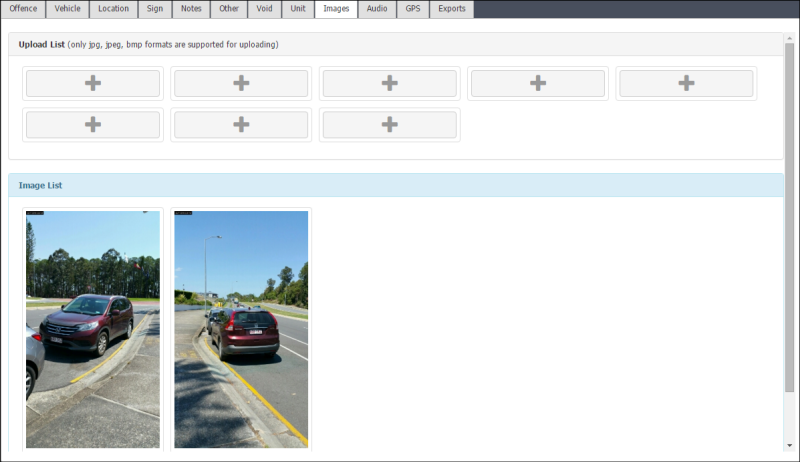
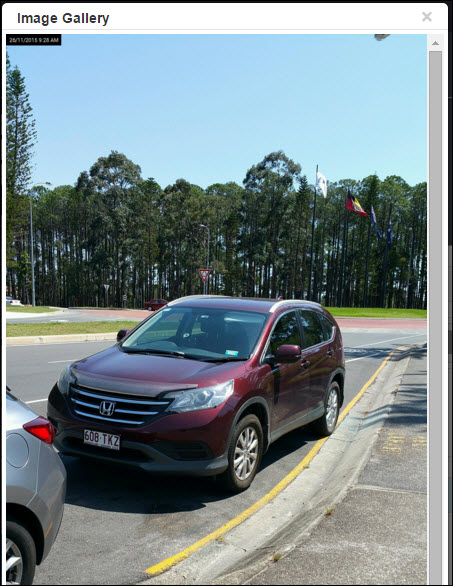
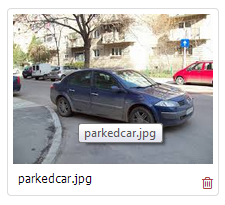
To display an image in full page gallery view:
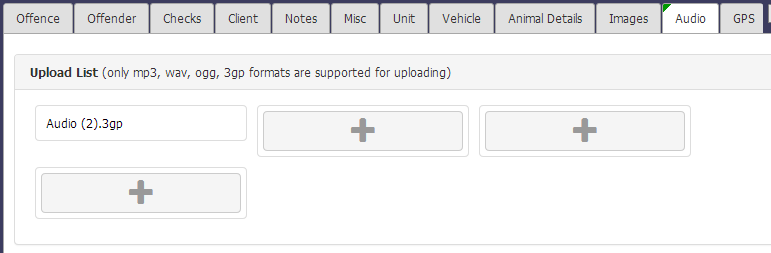
The Audio tab contains recordings that relate to the survey.

To listen to an audio recording:
![]()
To turn the sound off:
![]()
If the correct plug-in has not been installed on your browser, the audio recording will display in a different format:

These types of audio recordings will need to be downloaded and opened with an external media application.
The GPS tab display the GPS coordinates that were recorded for the survey.

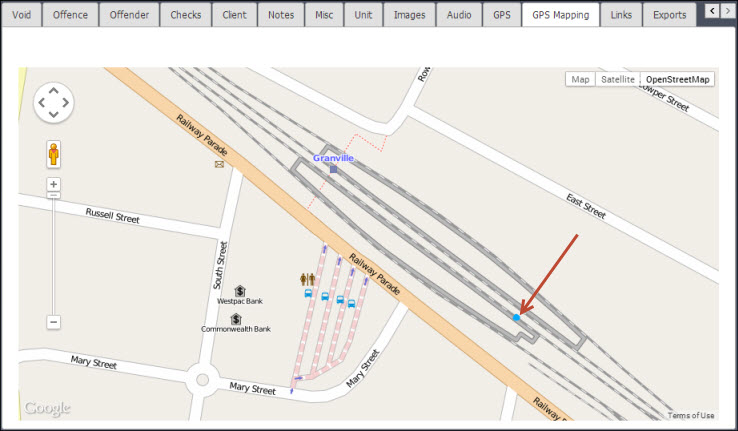
The GPS mapping tab displays a map showing the of the officer's movements at the time the survey was being issued.
The Links tab is displayed if the survey is linked to other surveys.

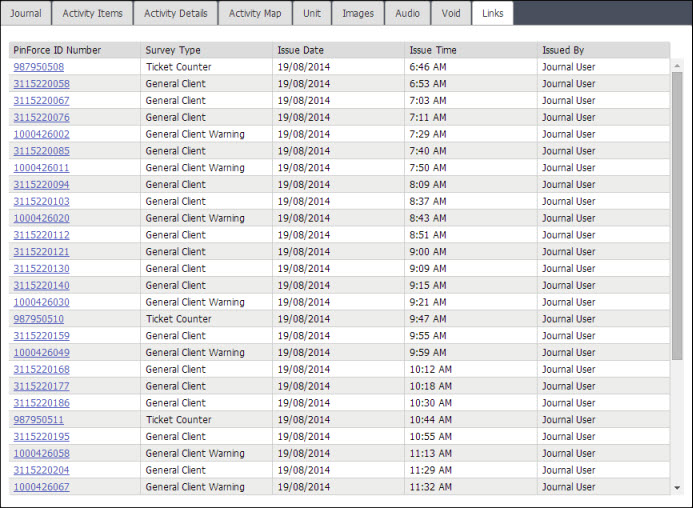
To navigate to the linked survey:
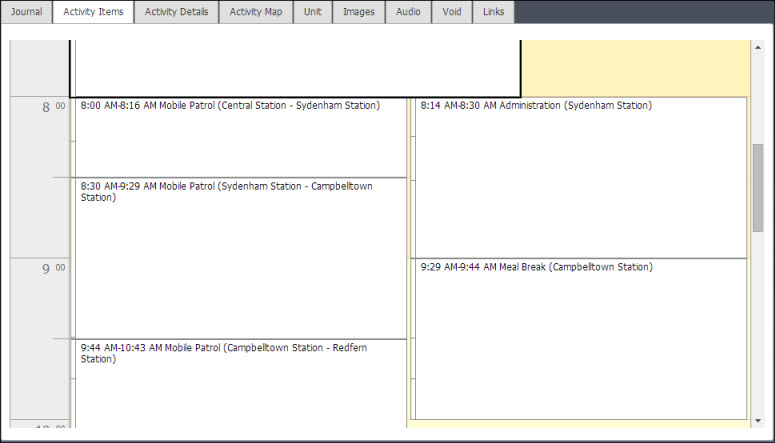
The Activity Items tab is only available for Journal surveys.
This displays a calendar view of all the activities that occurred during the duration of the Journal entry.
The Activity Details tab is only available for Journal surveys.
This displays a list of all the activities that occurred during the duration of the Journal entry with the following details:
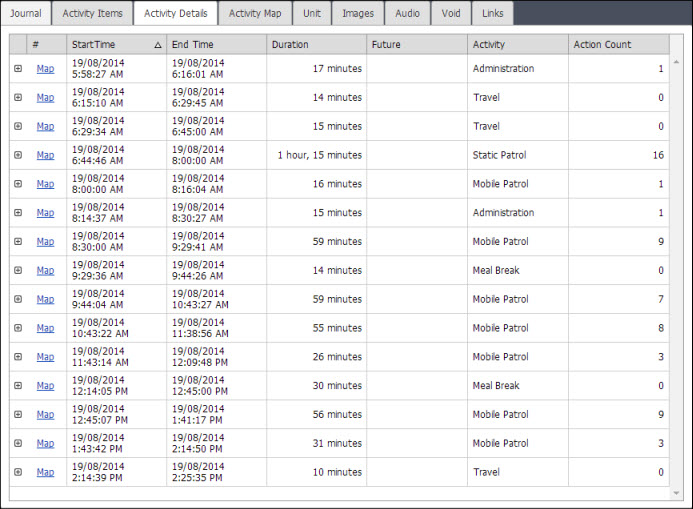
To display the Activity Map focused on the start point of an Activity:
To expand the view to display the Actions that occured for a particular Activity:

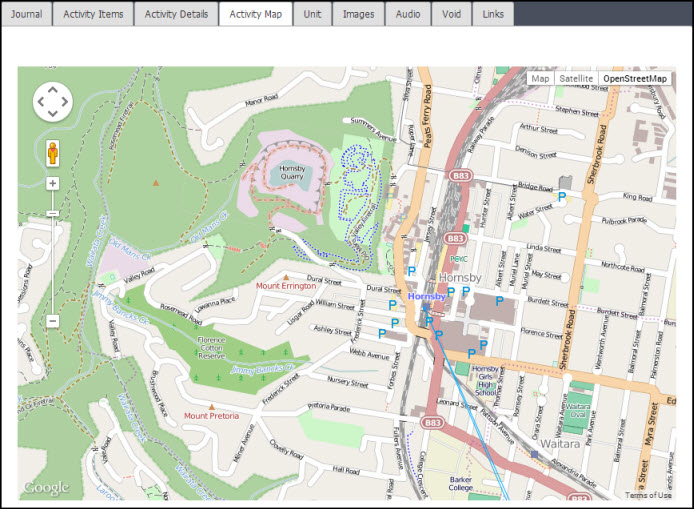
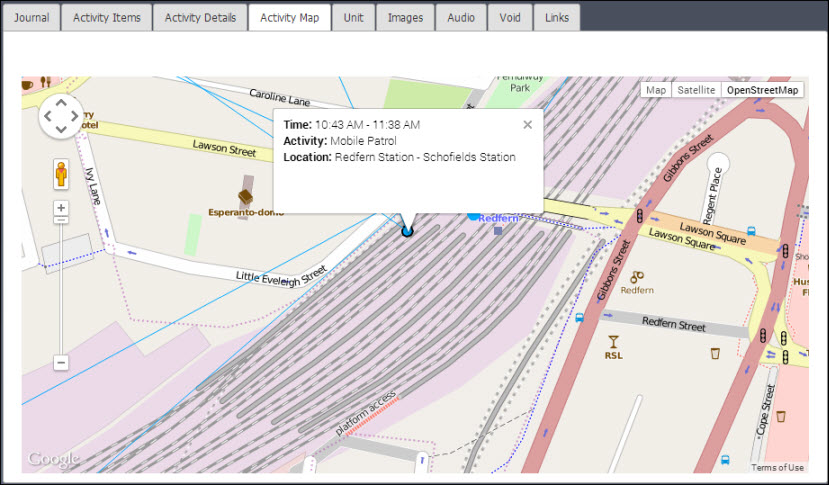
The Activity Maps tab is only available for Journal surveys.
This displays a map showing all the activities that occurred throughout the duration of the Journal entry. Each activity is connected with a line to show the path the officer patrolled during the duration of the Journal entry.

To display the details about an individual activity:
The Exports tab displays the survey export history. This includes surveys that have been exported through a scheduled task and manually.

The following survey editing options are available, depending on the survey type.
When changes are made to a survey, the Update button will be enabled.
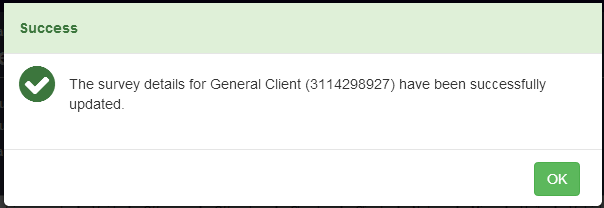
To save changes made to a survey:
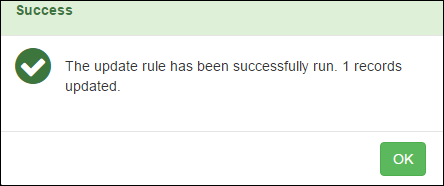
This will display the Success dialog.
The Confirm Navigation dialog will display if you try to leave the page without saving any changes.
Survey fields that can be edited are displayed in white or light grey in the Value column.
To change the value of a survey field:
When a field has been edited a green triangle mark will display on the left hand top of the cell and also on the tab that contains the field ![]() .
.
To add an image to a survey:
 .
. 
To remove an image from a survey:
To add an audio file to a survey:
. 
To remove an audio recording from a survey:
![]()
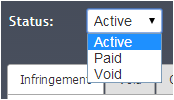
This section applies to surveys that have been configured to allow users to change the survey status.
The following survey status's are available (depending on the survey type):
Only surveys with a status of Active or Paid can have their status changed (to Paid or Void).
Surveys with the following status types cannot have the status changed:
To change a survey status:
When the status of a survey is set to Void, it is equivalent to deleting the survey.
Surveys are automatically voided when they are reissued (a feature not available on PinForce Web).
Surveys can be manually voided in PinForce Web (provided the user has the appropriate authority). Once a survey has been voided it can no longer be edited.
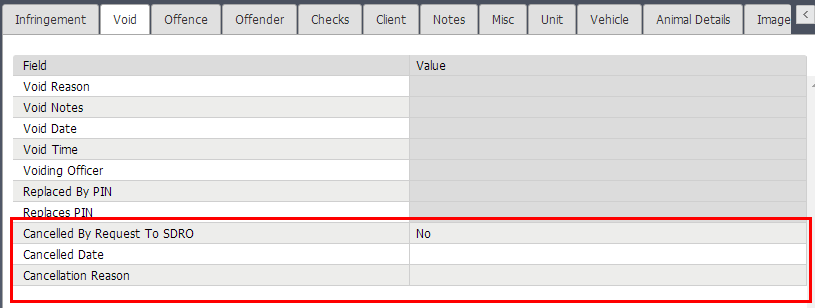
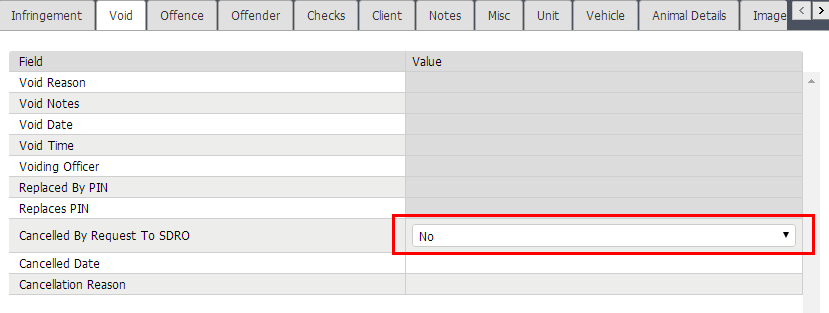
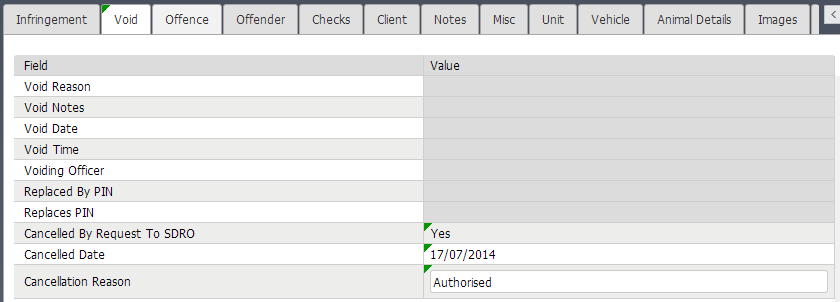
When a survey's status is changed to Void the details are recorded in the Void tab.

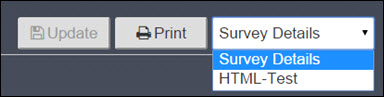
To print a survey's details:
This section cover the following lookup table functions:
To display the Lookup Tables screen:
The Lookup Tables screen contains the following information:
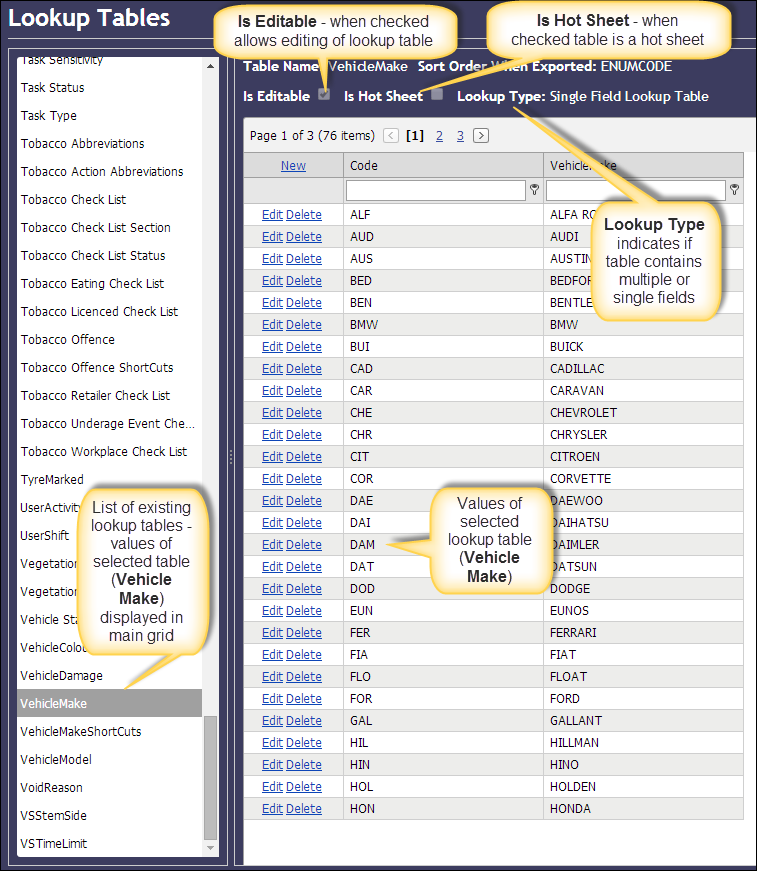
Refer to Working with grids for details about how to change the appearance of the results.
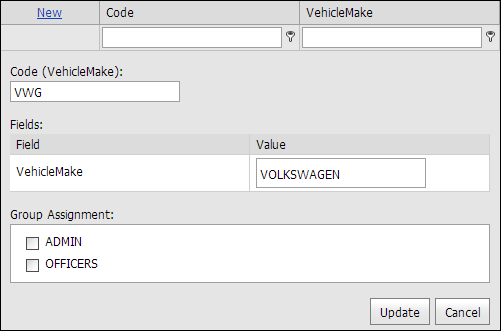
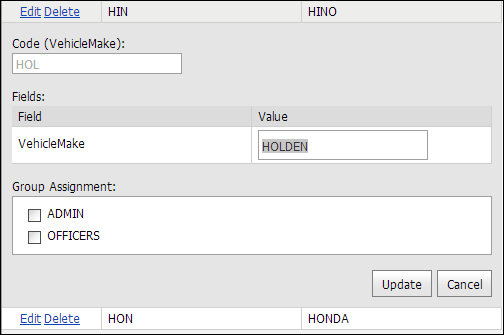
To add a new value to a lookup table:
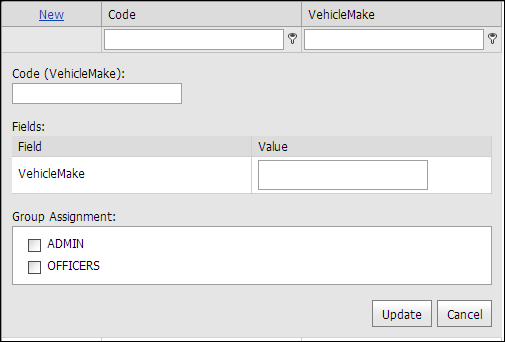
The fields displayed will differ depending on the lookup table you have selected.
To edit a lookup table value:
To delete a lookup table value:
![]()
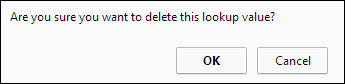
The record is not permanently deleted and will display as disabled in the list of values for the lookup table.
![]()
To restore deleted values to a lookup table:
![]()
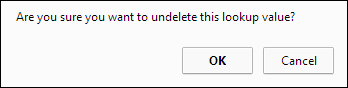
The record will be restored in the list of values for the lookup table.
![]()
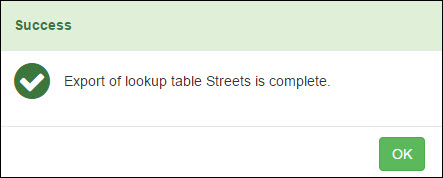
To synchronise a lookup table so that any changes to the lookup table are exported:
The Success dialog will display when the synchronisation is complete:
 ;
;
The Check Digit calculation function generates a Check Digit for PIN numbers and vehicle registration numbers for validation purposes.
PinForce Mobile requires a check digit number against a car registration number. The check digit number is displayed on the registration sticker.
To display the Check Digit Calculation screen:
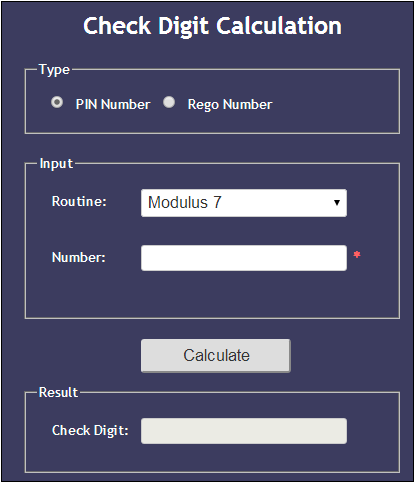
To calculate the Check Digit for a Rego Number:
To calculate the Check Digit for a PIN number:
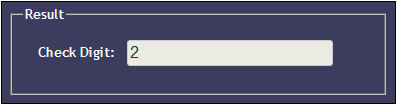
The Check Digit will display in the Result section.
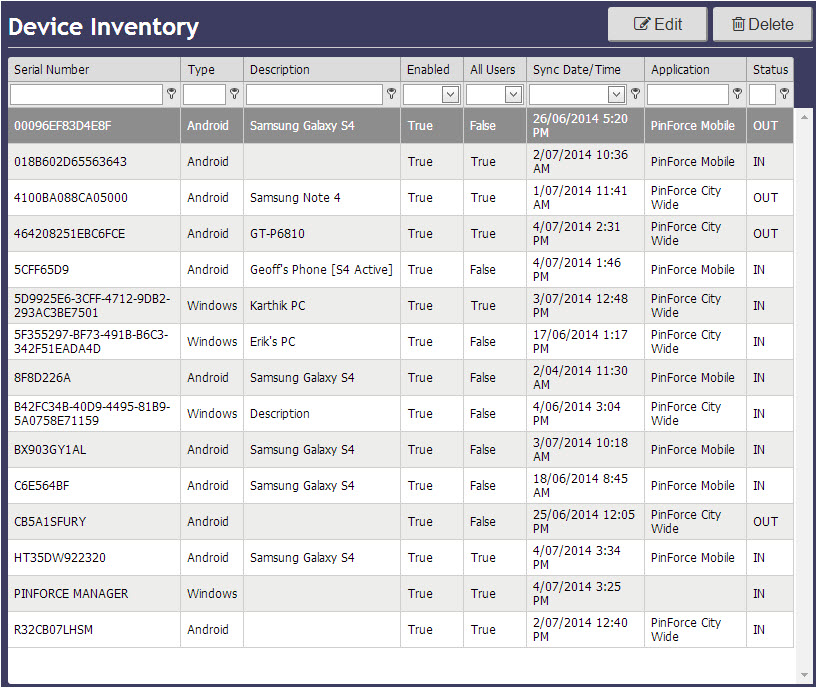
This section cover the following device inventory functions:
The Device Inventory screen lists all the devices that have been synchronised with the PinForce system that are used in the field for PinForce Mobile and PinForce City Wide.
To display the Device Inventory screen:
The Device Inventory screen contains the following information:
Refer to Working with grids for details about how to change the appearance of the display results.
To view a particular device's details:

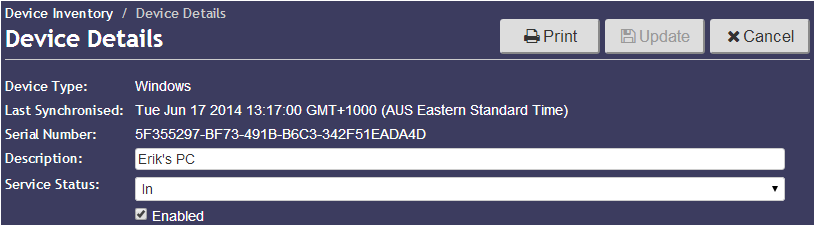
The Device Details screen contains the following tabs:
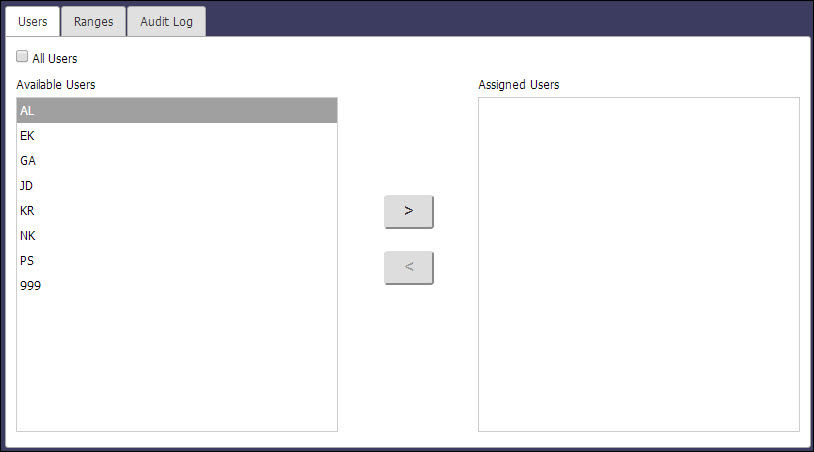
The Users tab displays the Available Users and Assigned Users. This tab is used to assign user(s) to a device.
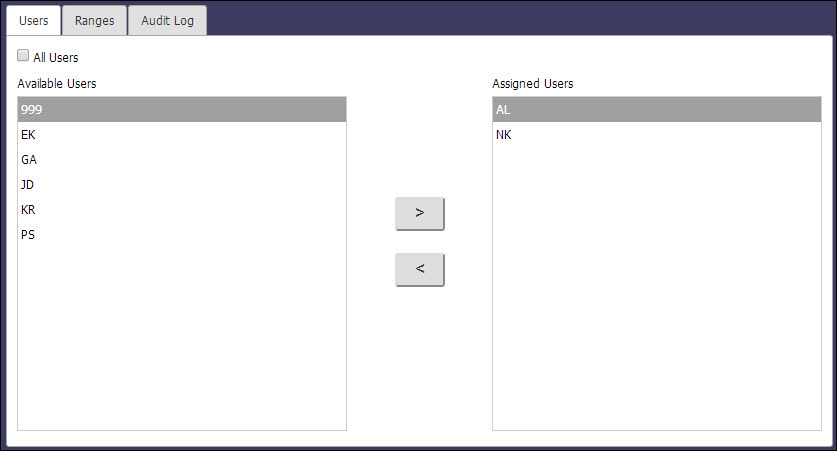
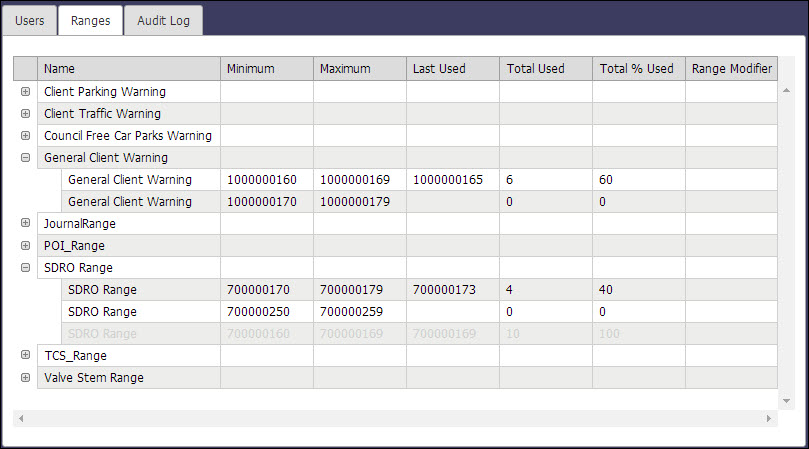
The Ranges tab displays the infringement number ranges that have been allocated to the device, along with details about current usage.
A device is always allocated two blocks of PINs for each infringement type, this means that as they go through one range on the device, the second is there as backup.
The infringement numbers are allocated to a device during the synchronisation process.
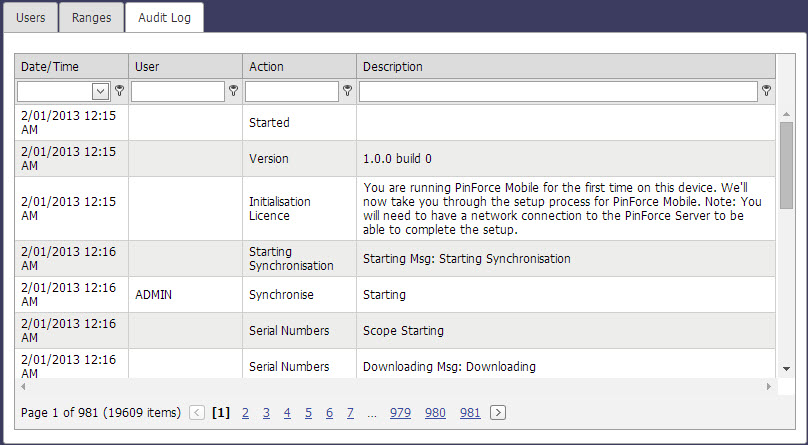
The Audit Log tab shows details of the audit trail for the device, including information such as dates and times of issued infringements, synchronisations, valve stems and users that have been logged in to the device.
The audit log is stored on each device and transferred across to PinForce Manager during the synchronisation process.
To edit device details:
The following fields are editable:
You are also able to:
When changes have been made to the Device Details, ![]() will be enabled.
will be enabled.
To save any changes:
When a device is first synchronised with PinForce Manager, the device type and serial number are entered in the Device Inventory grid. However the device cannot be used until the device has been enabled.
To enable a device:
The user(s) assigned to use the device must be added in the Users tab of the Device Details. This will enable the user to login to PinForce Mobile on the device.
It is recommended that an administrator or team leader also be allocated to use the device for troubleshooting purposes.
To assign a user(s) to a device:
To delete a device from the Device Inventory:
When a device with no associated ranges (or the associated ranges that have not been used) is deleted, the device details are removed from the Device Inventory.
When a device with associated ranges is deleted, the device will be disabled in the Device Inventory.
To easily re-enable disabled devices:
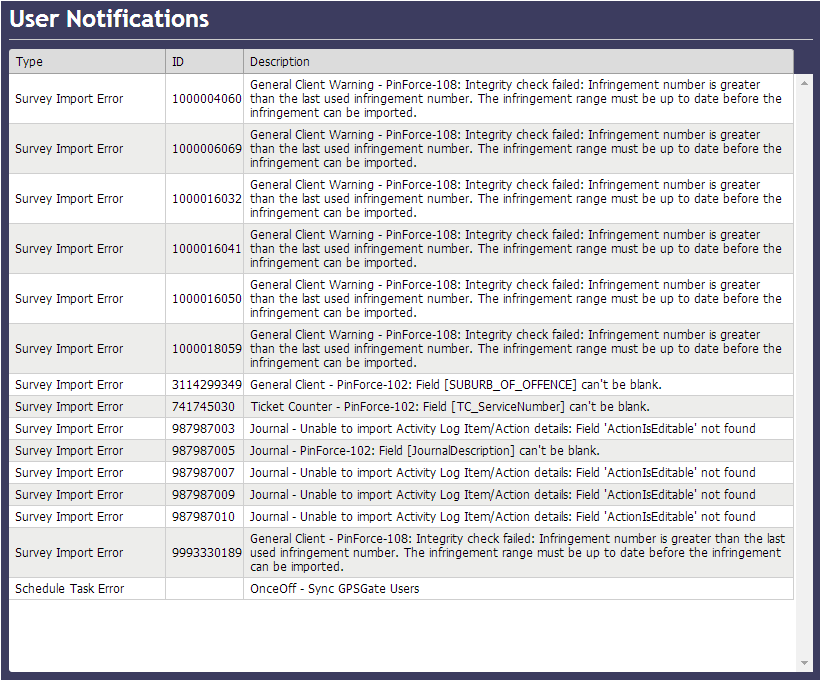
The User Notifications screen displays a list of various errors on the system.
Options to display the User Notifications screen are:
The list contains the following error types:
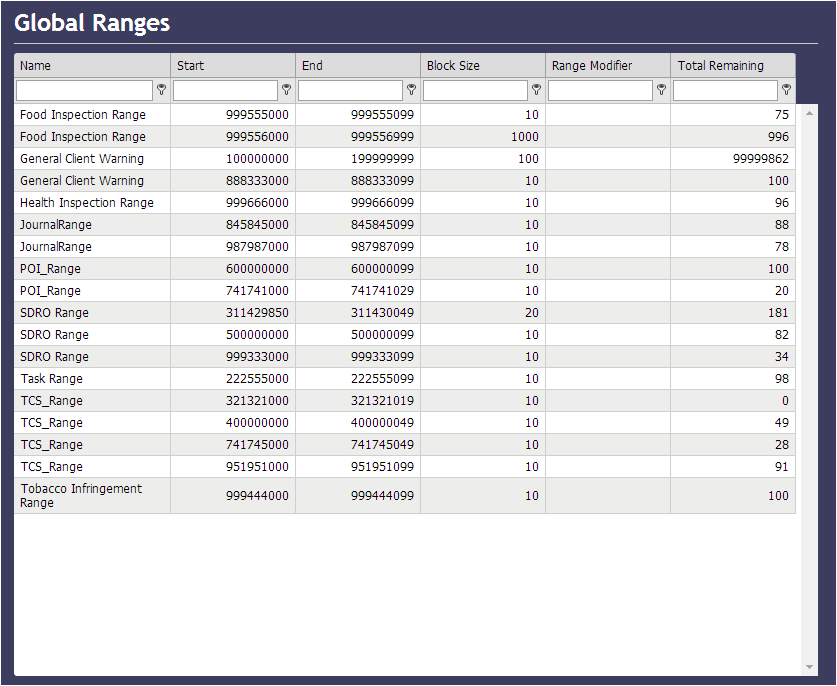
To display the Global Range screen::
The Global Ranges screen is available for users using automatic range allocations and provides the current status of the ID number ranges for each survey type including:
 .
.
Refer to Working with grids for details about how to change the appearance of the results.
When PinForce Manager is licenced for the automatic range allocation, blocks of number ranges must be set up for the every survey type that the user is licenced to use before any devices are first synchronized.
Recommended block sizes differ for each installation. We suggest that for each survey type you calculate how many surveys can be expected to be issued between device synchronizations. For example, if the average number of parking infringements recorded in PinForce Mobile per day is 200 (per device) and the devices are synchronized with PinForce Manager daily, then 200 would be a reasonable block size that survey type.
PinForce Manager then ensures that each device is allocated the equivalent of double the block size. When a device is first added to inventory, two blocks of number ranges for each survey type are allocated to the device. When a device is synchronized with PinForce Manager, new blocks of number ranges are allocated, if required, to ensure that the device contains two blocks worth of available range numbers
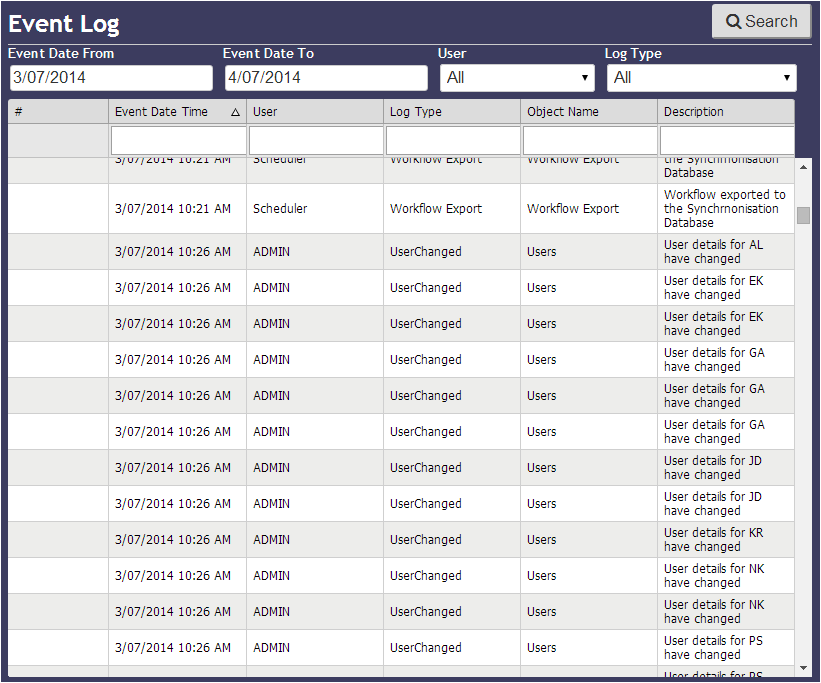
This section covers the following Event Log functions:
The event log automatically keeps track of significant system events, for example, when you login, when you import records, when you modify/delete records, when scheduled tasks run and when a user has their group status modified. The Event Log grid displays the event log entries from the database from the most recent to the least recent up to a maximum of 10,000 entries.
To display the Event Log screen:
Refer to Working with grids for details about how to change the appearance of the results.
The information displayed for each event includes:
To filter the Event Log grid and make it easier to find a specific log item:

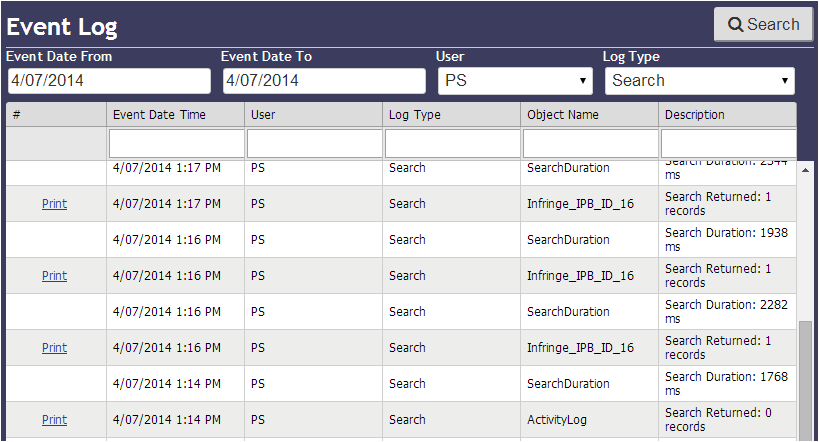
A Print link is available against Event Log actions with the following Log Types:
Note: This is only available for Event Log items that have been actioned from PinForce Web Client.
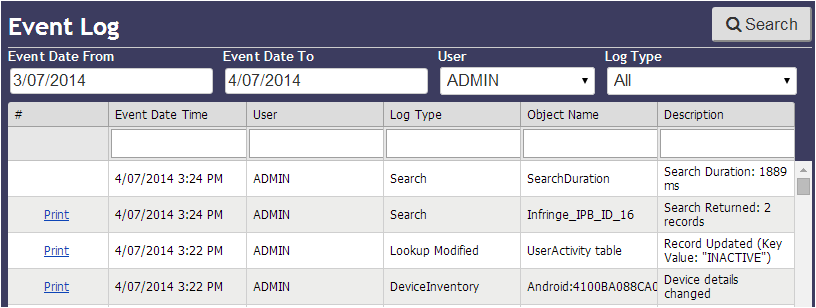
To print an Event Log item:

This section covers the following Users and Groups functions:
To display the Users & Groups screen:
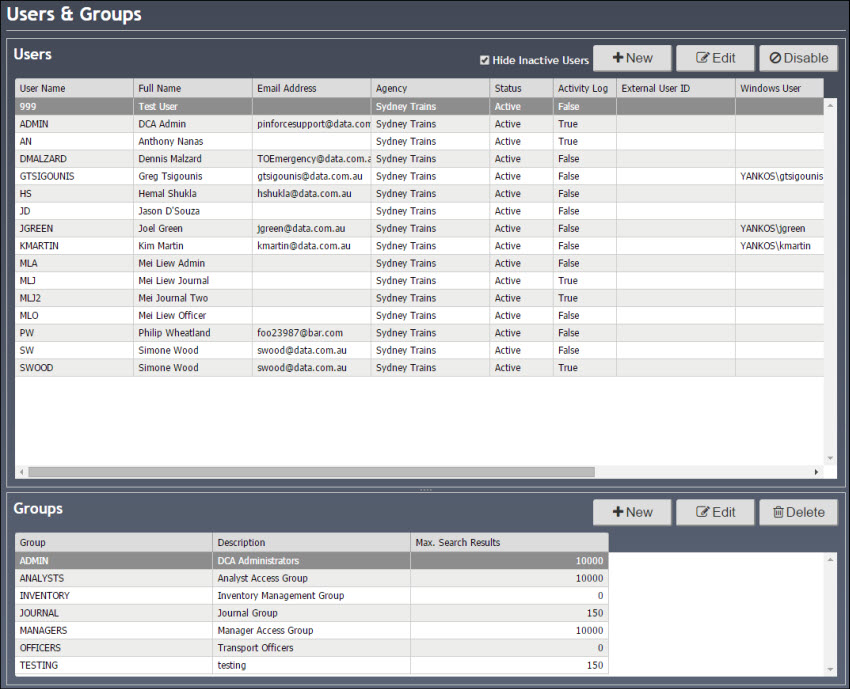
Note: Select the Hide Inactive Users check box to filter the Users list to display active users.
The following functions are available from the Users & Groups screen:
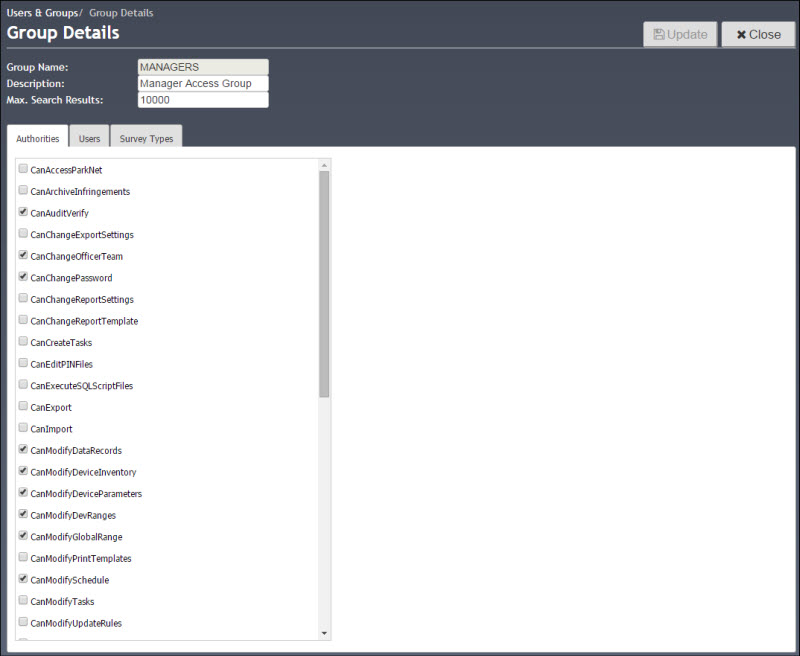
To view or edit the details of a particular group:
The Group Details screen displays the following information for the selected Group:
To create a new Group:
The Group Details screen displays :
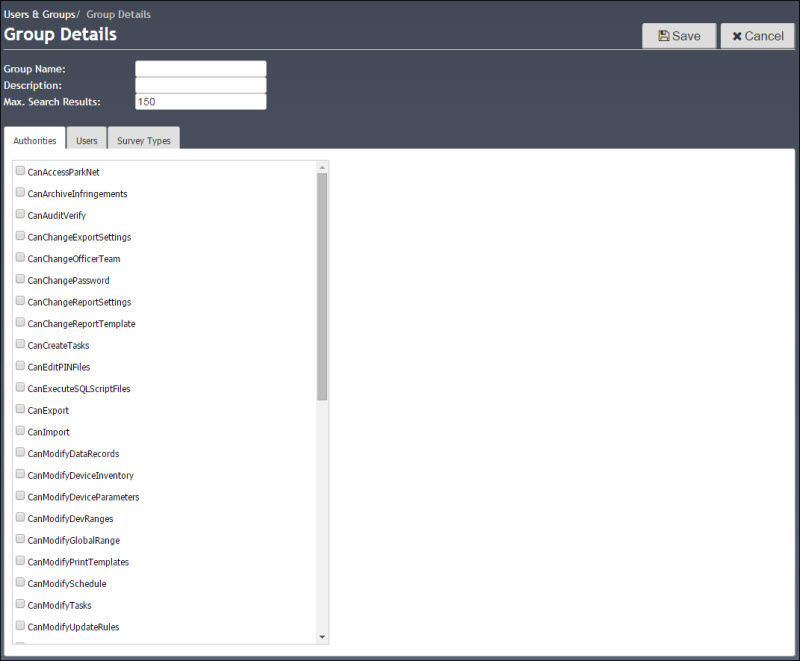
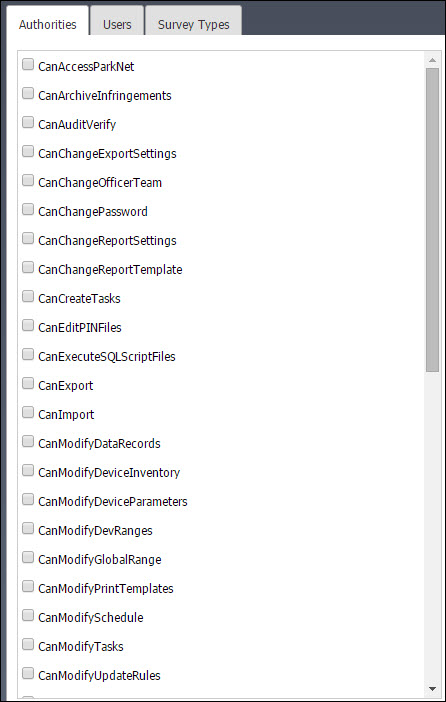
To select the Authorities this group is allowed:
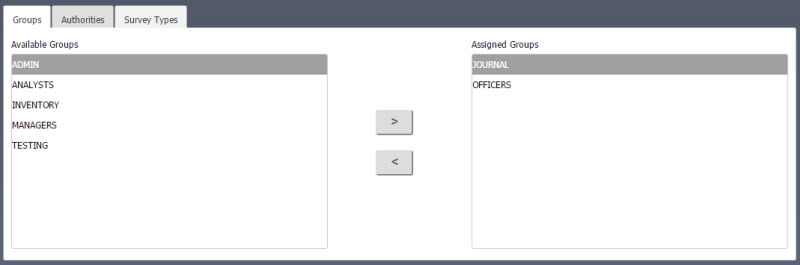
To select the Users who need to belong to this specific group:
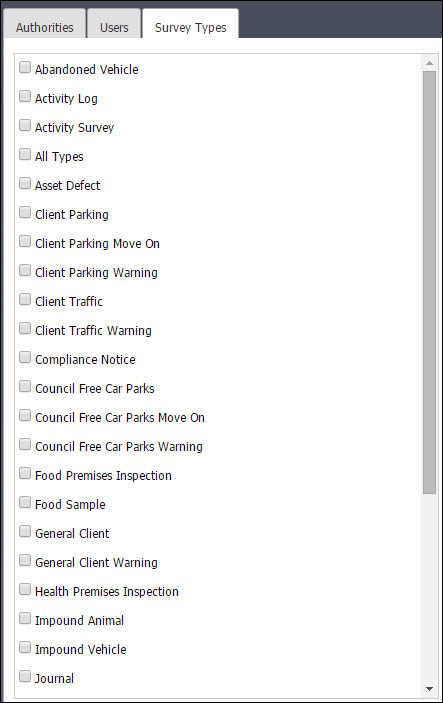
The Group Surveys tab allows you to define the infringement types that the Group can access. For example the Health Inspectors group can be prevented from viewing Parking Surveys and vice versa.
To select the Surveys this group is allowed to have access to:
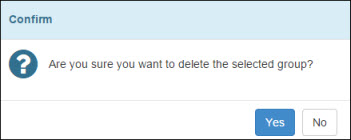
To delete a Group:
The Users grid on the Users & Groups screen displays the following summary details for all the users:
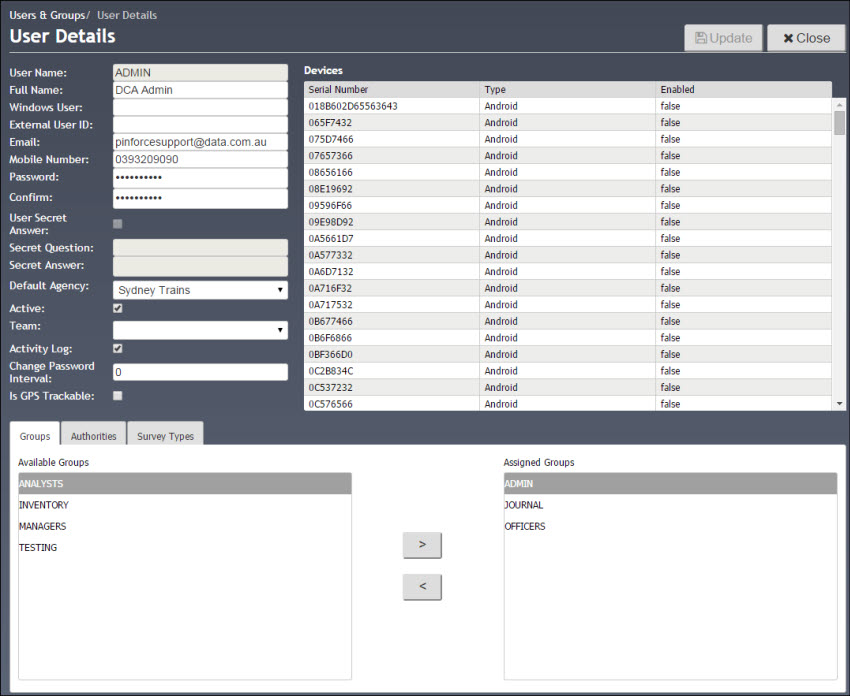
To view/edit the details of a particular user:
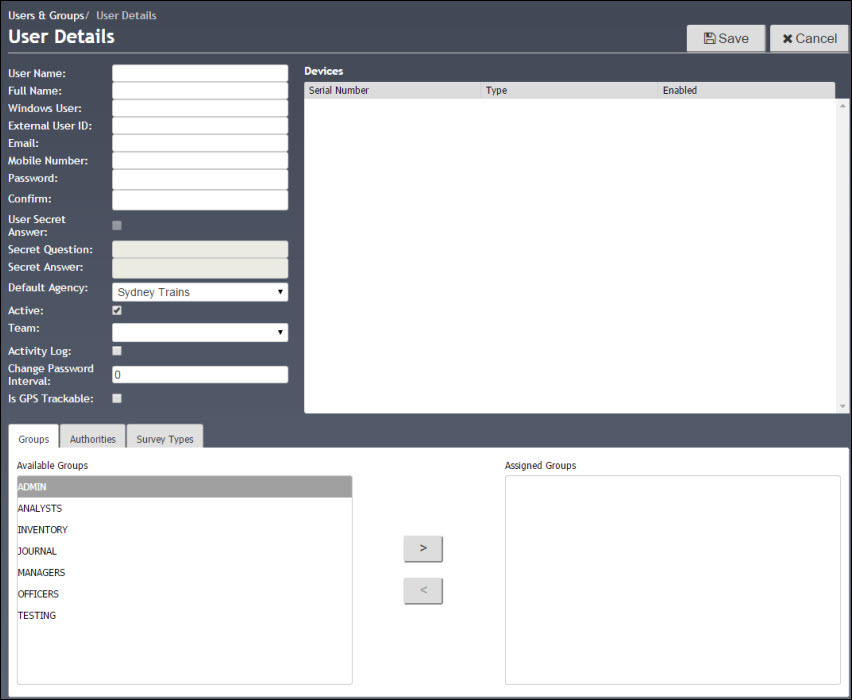
The User Details screen displays the following information for the selected User:
To create a new User:
 on the Users section of the Users & Groups screen.
The User Details screen displays :
 .
. The user status can be set to disabled. This prevents users from logging into PinForce and removes them from any group(s) that they belonged to.
Users with a status of disabled can be re-activated.
To disable a User:
 .
.
This will change the User's status to Disabled.
Users whose status has been disabled can be re-activated and all details that existed when the user was disabled are restored (password, group etc.)
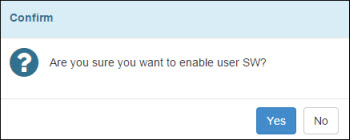
To enable a user:
 .
.
This section describes how to:
To run a report:
This will populate the Reports screen with quick links to the modules you are licenced to use.
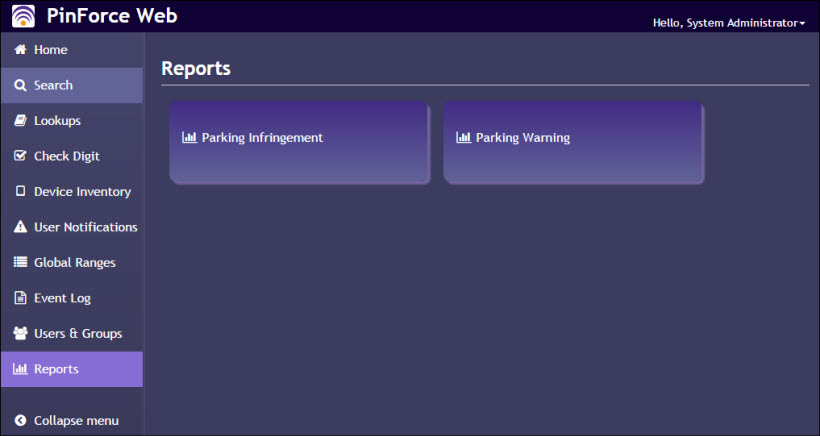
This will refresh the Reports screen with quick links to the available reports for the selected module.
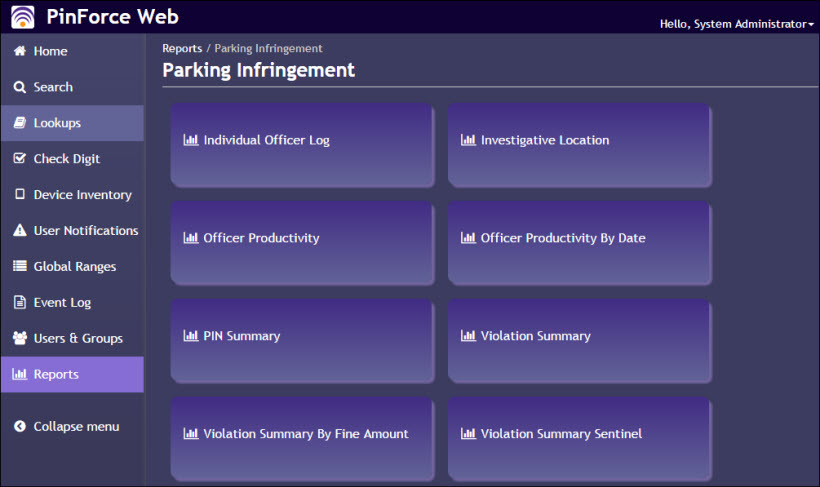
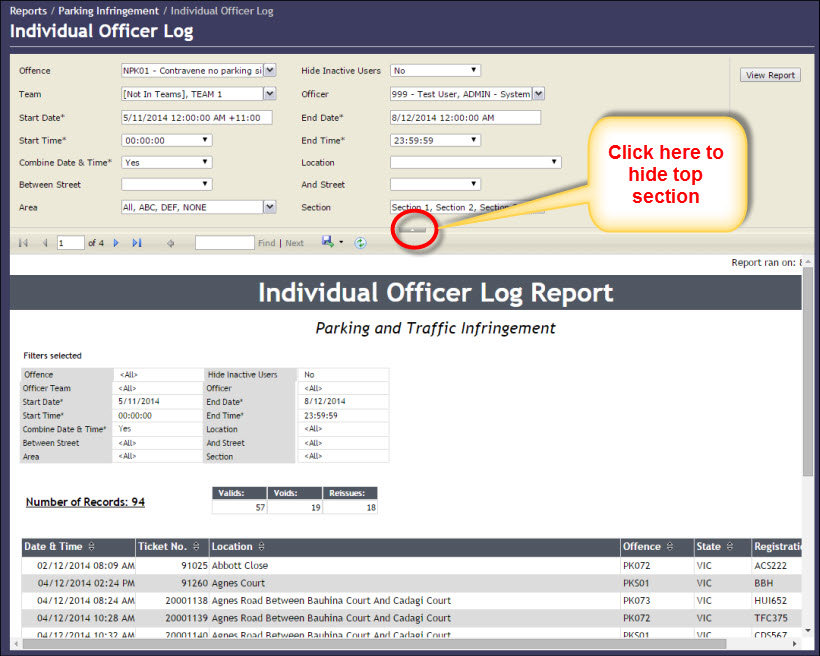
This will display the report criteria for the selected report in the top panel.
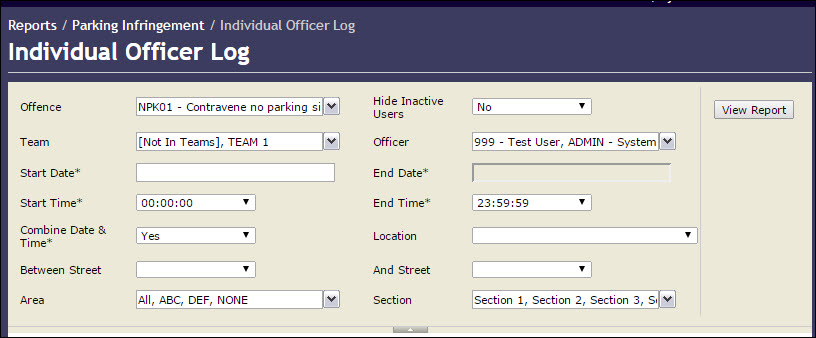
This will display the report results in the bottom panel.
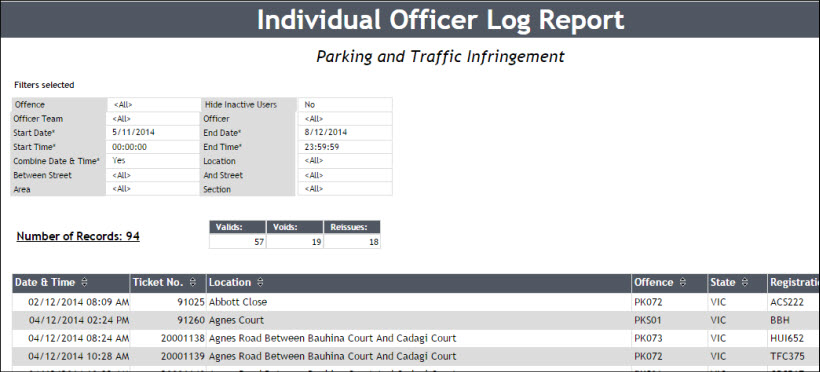
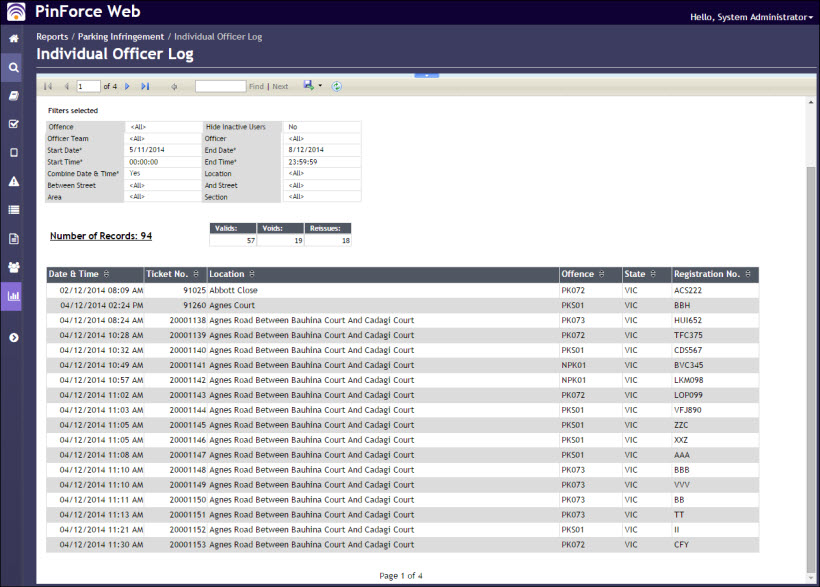
To expand the report details:
PinForce Web provides the functionality to define Update Rules and set the criteria for updating PinForce records.
To run Update Rules:
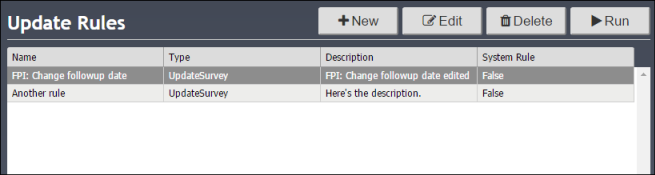
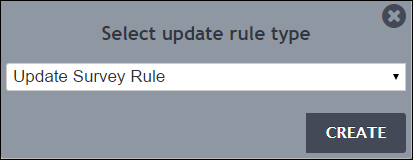
To add a new Update Rule:
This will display Select update rule type dialog.
This will display the Update Rule screen.
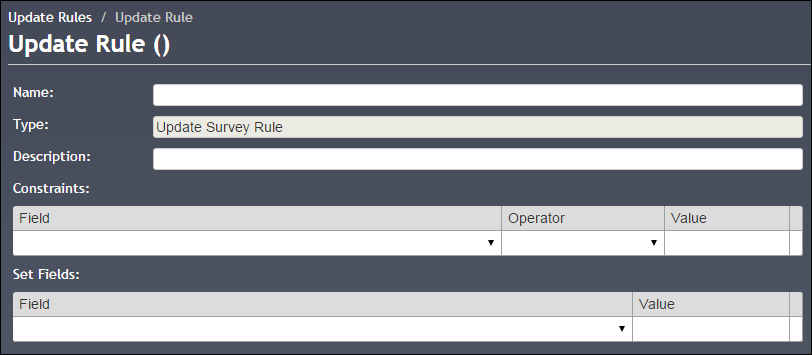
If you wish to add one or more contraints:
To set the value of the fields to be updated:
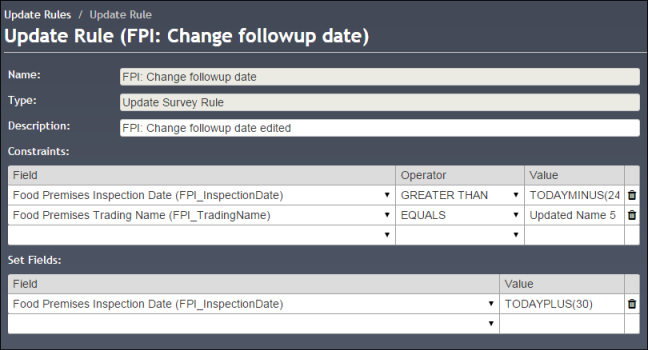
To edit an Update Rule:
This will display Update Rule dialog.
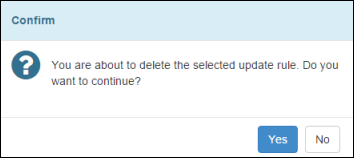
To delete an Update Rule:
This will display Confirm delete dialog.
To run an Update Rule:
This will display the Run Update Rule type dialog.
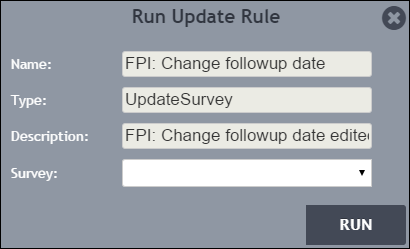
The system will process all surveys.
When the run is completed you will be prompted with an information dialog.